Back Shop is supported by Craft—designing Nordic ski collections worthy of World Champions and Everyday Heroes. craftsports.us
It’s race day, and whether you can see it or not, the snow is changing out there. Melting, freezing or grooming is playing a role in altering the structure of each snow crystal by the hour, if not faster. How does this affect the speed of your skis, and what can you do about it? The answer is right on the bases, and the tiny patterns running their length.
Under a microscope, the bases of your race boards resemble a sponge, with pores and nooks to absorb wax and respond to heat, dirt, liquid, and friction. Most racing skis arrive in a proud new owner’s hands with their bases flattened and stoneground to showroom specs. This means that an advanced machine with a specially-trained operator and expensive grinding stone has leveled and imparted a distinct pattern in the base with technical, computer-aided precision. This pattern in the base is called the structure.
Stonegrinding is a seriously involved process, and not something anyone can pick up from a few manuals or Youtube clips. But while a stonegrind might do a great job of developing a ski’s base and helping it excel in a particular range of temperatures or conditions, the constantly-evolving snow on a racecourse demands even more adaptability.
The Tools
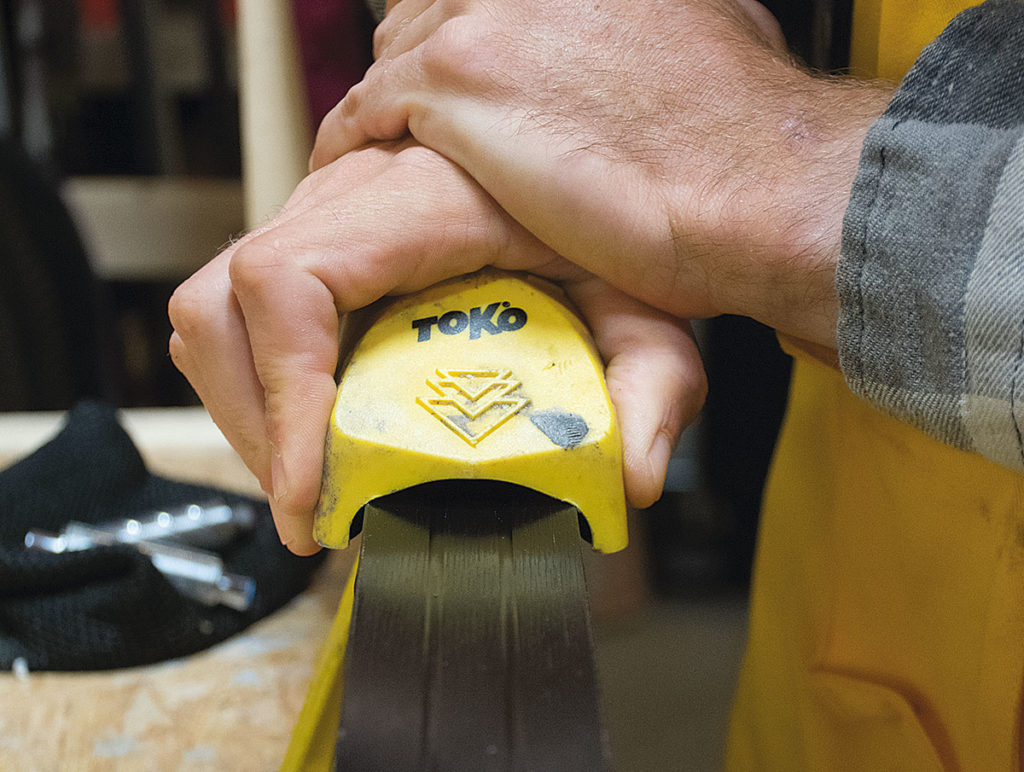
Enter the hand-structure tool: a user-friendly way to customize the bases of your skis for the snow situation in front of you. Often not much larger than your phone, hand-structure tools are simple plastic or metal boxes that can be easily added to a waxer’s toolkit. No irons, no chemicals, and no power source required. The original hand-structure tools simply gouged a pattern right into the base of your skis with a metal bar. These tools were best saved for slushy spring races, not only because of the wet conditions they excelled in, but also because they had a tendency to lacerate your bases and render them useless until another complete stonegrind.
Most newer structure inserts are cylindrical pieces of metal, which roll across your bases as opposed to slicing them. The imprint they leave behind addresses a given snow condition, but the pattern then fades out (think handprint on a memory foam mattress) after enough skiing or wax applications. Most wax companies produce their own version of a hand-structure tool, along with multiple base-altering inserts to accompany them.
Adding more inserts to your hand-structure kit is like choosing a new razor; more blades, or rollers, give you better precision and adaptability. But more metal comes with a higher price tag and added complexity. Anyone without World Cup points on the line can do well enough with a few simple rollers, especially when you consider that multiple patterns can be overlayed on top of each other. Sometimes creativity trumps numbers.
The Process
Applying patterns to your skis with a hand-structure tool is easier and more intuitive than any other step in the waxing process. It’s often done as the very last step before the skis hit the trail. With all your other waxing steps complete and a fresh base at your fingertips, simply start at the tip of the ski and press down evenly on the hand-structure tool. Keep that pressure on as you roll the tool down the base toward the tail of the skis. Flat bases, clean skis and stable wax benches help produce the best results.
With the wide array of patterns out there, it’s often not enough to just throw out a guess and start pressing metal into your skis. The best way to test structure patterns without a full fleet of matched test skis devoted to the cause is by using one or two pairs of skis and working up from less structure to more. Start with one ski in its original state beside a ski with a light structure on it. Is the ski with structure feeling faster? If so, add structure to the ski which was originally blank. Either add a deeper version of the first tested pattern, or a more aggressive pattern altogether. The process just continues from there, depending on how many patterns you’re working with. Even with just a few options and some short testing laps, you’ll probably end up with skis faster than you started with.
It’s also useful to put a little time and effort into testing structures on regular training days, too. Applying hand-structure is so quick and easy that every training session can be a structure test of some sort. Keep notes if you prefer, or if you’re working up to being a real ski guru, just file the results away in your cranial wax box.
Structure tools aren’t cheap, but they can play a crucial role in making your skis fast. Empty fluoro bottles end up in the trash, and even the most beloved brushes will wear down to soft fuzz, but a trusty hand-structure tool is a piece of equipment that won’t lose its utility anytime soon.
Swix Structure Roller Tool
swixsport.com · $120
Toko Structurite Nordic
tokous.com · $90
—
Adam Terko is the head coach of Vermont’s Mansfield Nordic Club and has been skiing competitively (and writing about it) since before Fischer skis had holes in their tips. He’s also the technical editor of Cross Country Skier and writes the how-to column “Back Shop” in each issue.
Subscribe now to the print magazine to read Terko’s latest column and more at crosscountryskier.com/subscribe.